Cosplay Progress: Love Live! School Idol Project
Today I’m going to be uploading some WIP shots of my Love Live! School Idol Project cosplay. I made Kotori Minami’s “ユメノトビラ” (Yume no Tobira) outfit from their 15th album, which appeared season 2×3 of the anime ^^ I have a huge soft spot for flowers, pastel gradients, bridal satin, and chiffon, so this costume was so fun to work on. I still have some things to touch up on (especially the gradient dye on the chiffon — it came out too light!) but overall I was really happy with how it turned out!
The chiffon overlay! I draped the chiffon over a dressform, then baste stitched a line across the bust, gathering it until it circled around to a way I liked it. I then blindstitched the chiffon onto the dress. 🙂
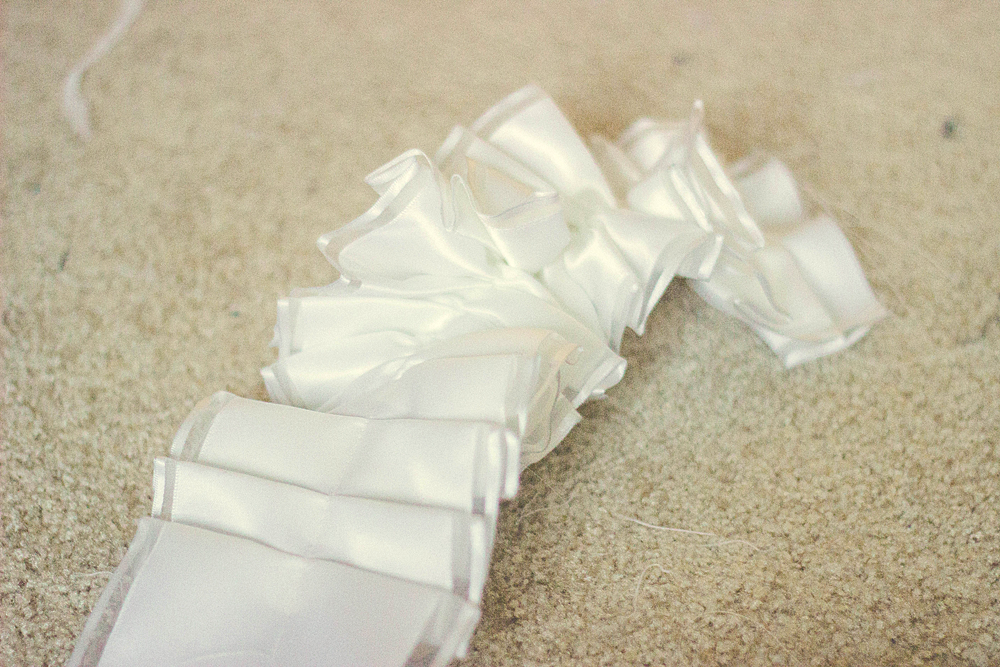
The ruffles on both the dress and around my arms were made of a large single layer of ribbon that I hand-pleated (shown above). To get the edges, I sewed a trim of wired organza ribbon for a prettier look. Kotori has two sets of ruffles on her dress, but I was afraid it’d be too bulky, so the wired ribbon sort of acts like a faux-double layer. I might add a second layer of softer fabric in the future, though! After that I sewed 2 basting stitches down the center to make a gentle gather.
Pinning the ruffles onto the dress!
Next I created my own arm ruffles using the same ribbon and wired organza. This time sewing to both edges because I wanted the look to be symmetrical.
My cat loves to sleep on my fabric/me while I’m working, and after I’d finished my first arm ruffle, I had an idea…..
……and the result LOL.
HAHAHAHA! She sat there for awhile before getting tired of it and wiggled out.
Here’s the drape of the chiffon on my form! I was so sad that after I finished the edges the cascade wasn’t nice anymore 🙁 I’m still learning how to handle chiffon.
Here’s how the dress looks so far ^^ Kotori has more of a center dip in the bodice, but I personally liked the straight waist more on me.
Test look of most of the pieces together!! I ran out of blue fabric so I couldn’t do a circle skirt like I wanted LOL! Adding the trim later. Still have to dye the overlay before I attach it to the dress!
My lil’ helper… laying down on my flowers… bein’ cute.
As you can see the blue and pink gradient on the chiffon ended up too light ^^; It was my first time dyeing chiffon and while I was happy with it at the time it totally got washed out in photos (and in person too… I went too subtle haha)!. Along the edge of the blue fabric (and mirrored in my choker) is a trim of white rickrack.
Materials Used
Bridal satin (white)
Chiffon (white)
Satin ribbon (white, blue)
White organza wired ribbon
White rickrack
Blue, Crimson iPoly Dye


Hello! Thank you so much. 🙂 I believe I used iDye Poly for the chiffon. I tried to use RIT Dye on it but it doesn't hold onto the synthetic fibers (this chiffon is 100% polyester.)
Oooh nice! I hope it works out! I've yet to try Silk-Color but that's on my list of dyes to test out. 🙂 I use a 5-gallon bucket to dye my fabric (I set it in the bathtub) and boil water separately in a pot so that I can clean everything up easier! I'd recommend using a pot ONLY for dyeing fabric, because of the chemicals and possible staining.
Woah this looks really nice 🙂 I have a question though, what colors of the iDye Poly did you use?
Hello!! Thank you so much! I used "blue" and "crimson" :)! I'll add that to my entry, hehe.
Do you remember where you bought the white and blue bridal satin? It's absolutely beautiful and I'm having trouble finding fabric
Hello! Both of the satins were bought at a local Jo-Ann Fabrics store! Thank you so much for liking them — this specific white bridal satin is a personal favorite of mine to use. The blue satin shown is actually the wrong side of the fabric lol! So if you go looking for it, you'll have to turn them over to see. I wish I kept the names of them – I hope that helps!